

For those who haven't heard of it, postman is a tool for interacting with and exploring API's. Effectively it's a pretty UI on top of curl; but it makes a big difference when figuring out how exactly to structure an API call, or testing what the response from an api might look like.
Let's get started, first go ahead and GET POSTMAN;
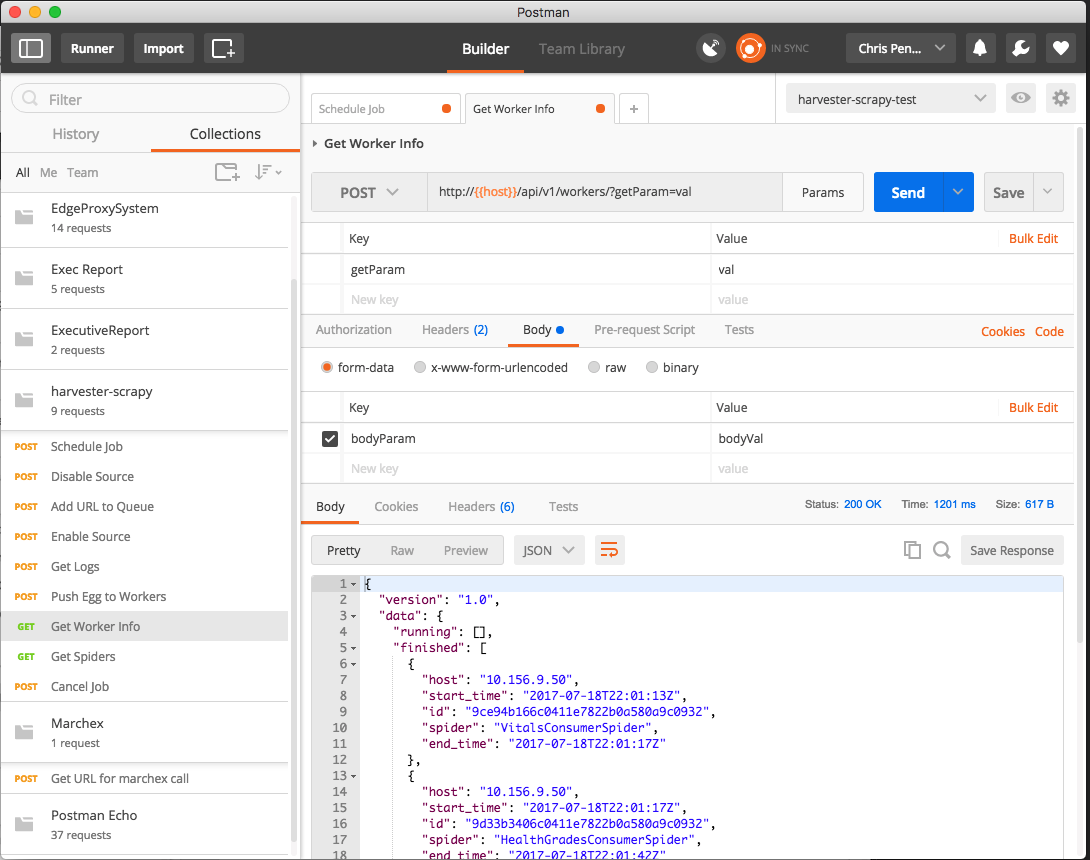
Here's roughly what you'll see when you start it up:
Requests
Let's walk through the Request interface (in order of importance, stop when you get bored)
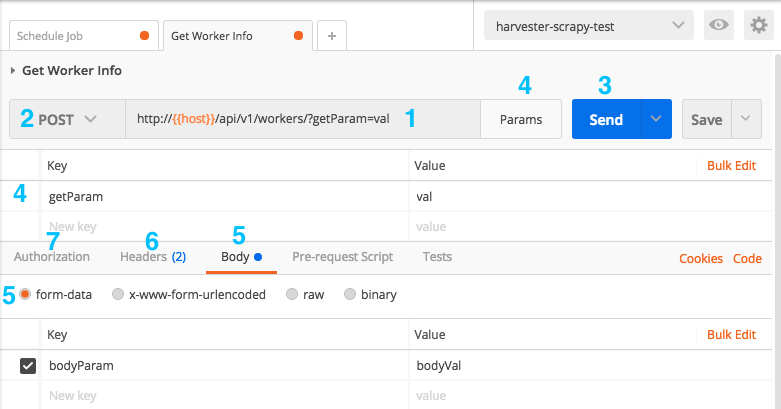
- URL
- This bit's pretty important, put a URL in here, click the SEND button. Now you can use Postman.
- HTTP VERB
- Here you can choose what type of request to make; GET, POST, PATCH, DELETE, etc.
- This choice effects which other options are available; for instance you can't set a BODY on a GET request.
- SEND
- Hit this button to make the magic happen and actually send off your request.
- Params
- This gives you a nice interface for editing GET parameters as keys and values. Don't get it confused with the idea of sending keys and values with a POST request.
- Body
- Only available on non-GET requests
- Can choose your body type and it'll encode it for you
- Use 'raw' and use the dropdown on the right to set the content-type to JSON for most APIs
- Use form-data if you're simulating an old-school form submission or some older-style APIs
- Headers
- Set any HTTP headers you need here;
- Typically just used for Authentication headers; You can put a jwt auth header in here for instance.
- Authorization
- Sometimes helpful for interacting with 3rd party APIs
- Choosing Basic Auth will encode a username and password into the request for you.
Responses
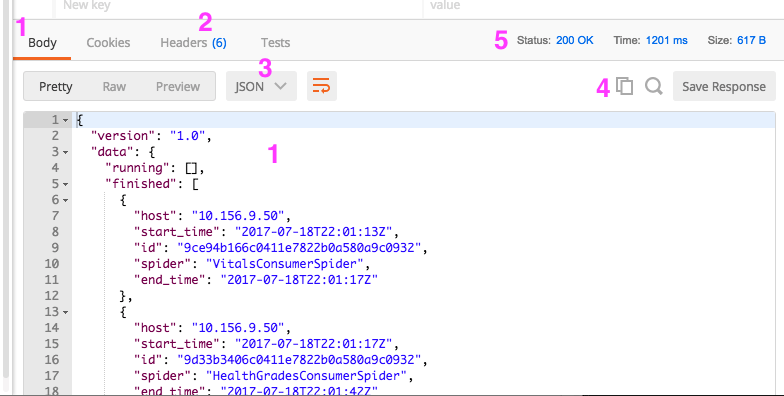
Cool stuff; we can set up our request. Now let's say we hit the big blue SEND button and we have a response!
- Body
- We're probably most interested in the Body of the response
- Headers
- If you want to check the headers of the response this's where you'll find'em
- Response Type
- Postman can pretty print the response if we tell it to; set this to JSON and it'll nicely format the response for you.
- Utilities
- First one is "Copy to Clipboard"; handy for sharing with your helpful co-workers
- Second opens a search in the response
- Third let's you save it for later
- Stats
- Here we can see Response Time, Status Code and response size.
So that's pretty much it for making simple requests, but I've missed a few of the more useful things about postman; you can save collections of requests to share with people; and also save lists of environment variables which can be interpolated into requests.
History
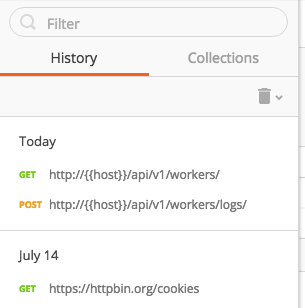
You can see your request history via the tab at the top and load up any past requests, which is handy if you've edited a request and want to get back to a previous version of it; or you're like me and you can't remember anything that happened more than 15 minutes ago.
Collections
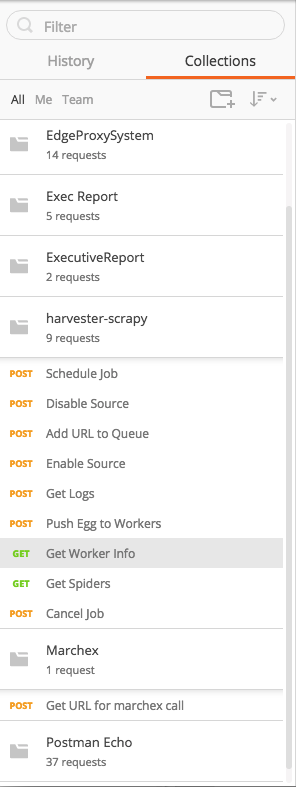
This panel on the left will probably have nothing in it when you start. At any time you can hit the 'save' button to the right of the URL bar to save a request for later.
I keep collections of requests around when I'm testing, and I often make collections to share with my team.
Environments
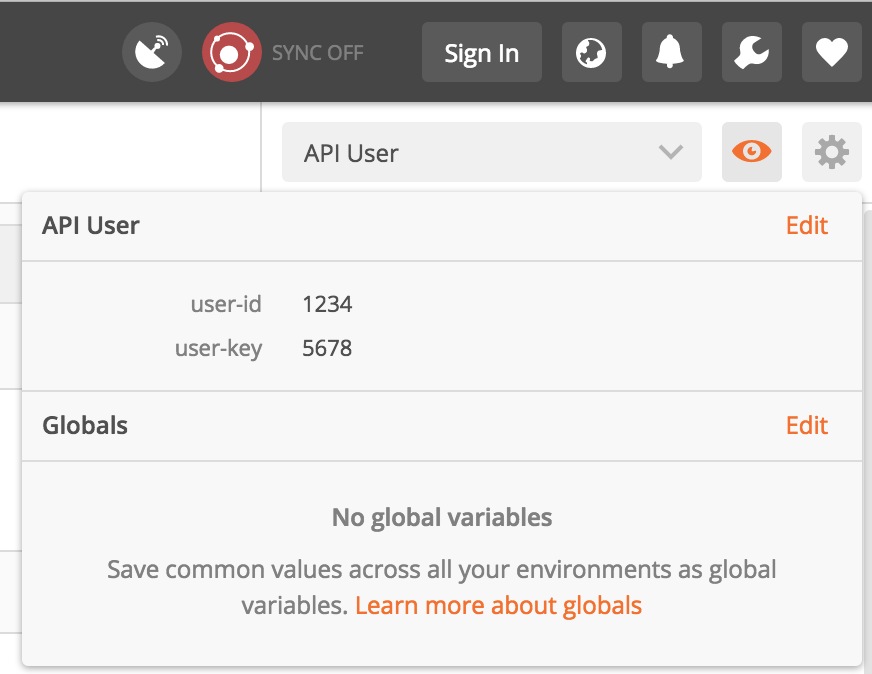
Here we can set a context to execute our requests in. An environment can contain a set of key-value settings which we can use anywhere in our request. This is great if you're testing api's as different users, or if you have to test the same calls against several different hosts.
If you set up some environment variables you can interpolate them
into your requests using double curly braces. For example you might make
a request to
example.com/my-endpoint?apiKey={{apiKey}}&apiUser={{apiUser}},
now if you have postman environments set up for each user and key you
can switch between them easily. You can use {{}} anywhere
it would make sense; e.g. urls, params, POST bodies, etc.
Need a session with the site? Use Interceptor
Interceptor is one of Postman's cooler features; it allows the Postman app to route the requests through your chrome instance; this means they'll include any cookies (and therefore sessions) you have in chrome.
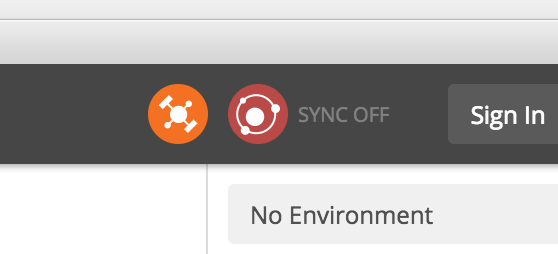
NOTE! Interceptor is currently only available in the chrome Postman plugin, NOT the desktop app; so if you don't see this icon, you're probably using the desktop app and will need to switch over to Postman chrome app to use it. You'll also need to install the Postman Interceptor Chrome Extension.
Now if we click to enable the chrome interceptor plugin, all our requests will pick up any cookies that exist in our chrome session! Handy! You can also flip a switch in the browser extension and have it track requests happening in your browser through Postman's history.
Importing/Exporting
Postman has the ability to import curl requests using the "import" button on the top left, but you can also export code for each request in a language of your choice using the "code" button on the right. You can export as Python, HTTP, curl, Go, Java, Node, etc.
That's pretty much it for Postman. Tip your servers, I'm here all week.
Hopefully you learned something 🤞! If you did, please consider joining my Patreon to keep up with my projects, or check out my book: It teaches the principles of using optics in Haskell and other functional programming languages and takes you all the way from an beginner to wizard in all types of optics! You can get it here. Every sale helps me justify more time writing blog posts like this one and helps me to continue writing educational functional programming content. Cheers!